Glue Gun Stencil St. Patrick’s Day Shirt
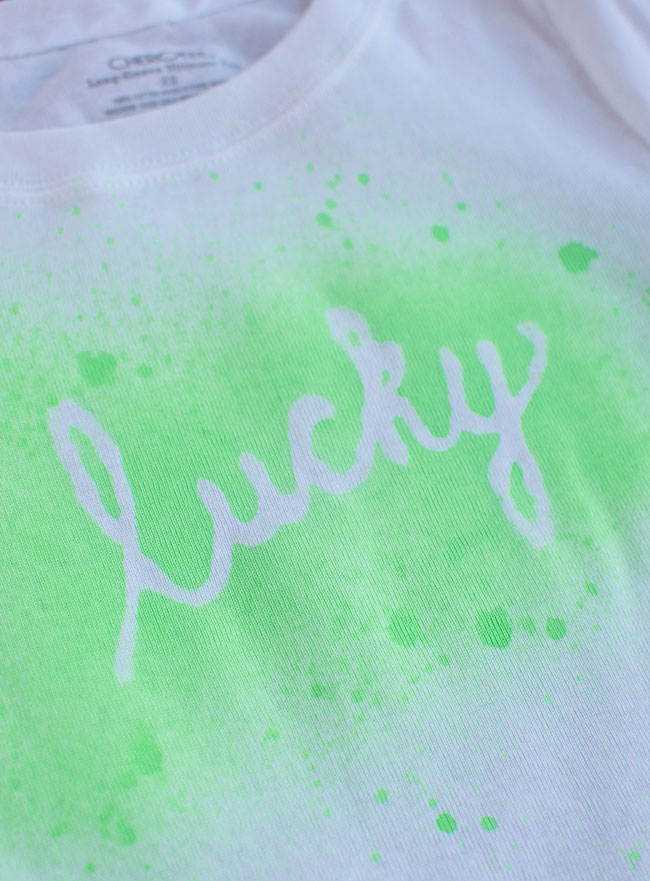
I’ve tried quite a few techniques for altering fabric: stamping, dying, freezer-paper stenciling, etc. As soon as I learned about glue gun stenciling I knew I had to try my hand at it. And, since green isn’t really a color my girls tend to have in their wardrobe, it seemed like a St. Patty’s day shirt would be the perfect project to give it a go.
How to Make a Glue Gun Stencil
The basic concept of making the stencil is super-simple:
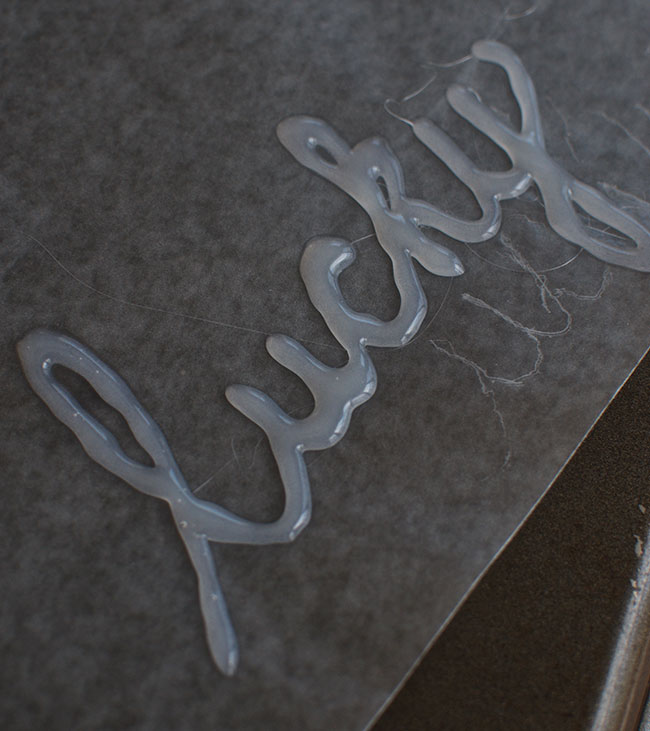
- Use a glue gun to create your design
- Wait a little bit and let the glue to cool and harden
- Carefully peel up the glue (you don’t want it breaking during the process of peeling it off)
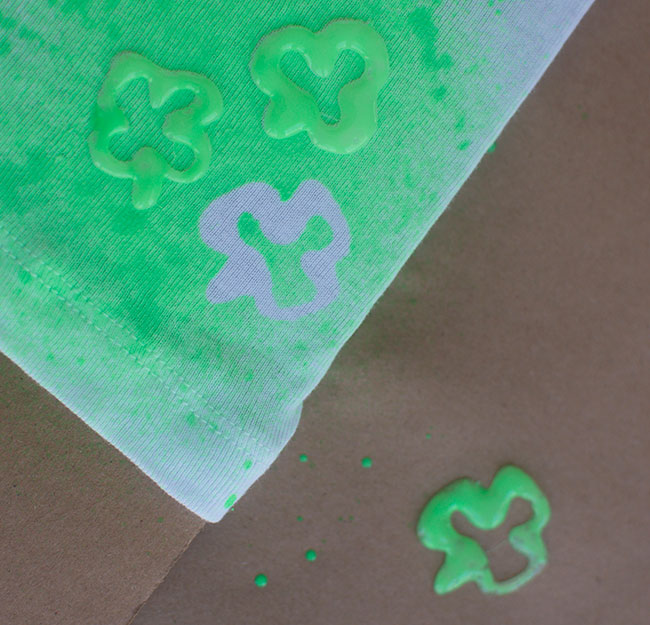
- Lay the stencil flat on the surface of your project
- Paint over it
- Remove stencil and smile
A Few Tips on Making and Using the Glue Gun Stencil
- Use wax paper. I tried gluing my design onto wax paper, aluminum foil, freezer paper, and a glass plate to see which one would allow the glue to come up the easiest and the cleanest. The wax paper was the easiest to get the glue off of. Plus, it has the added benefit of being see-through so you can place a piece of paper under the wax paper with your design on it and trace over it with the glue gun.
- Spray a little Pam. Even with the wax paper, the glue was difficult to get completely off of the paper. When I sprayed a little bit of cooking spray on the wax paper, the stencil was a breeze to get off. So, not only is it cleaner, but you’re more likely to maintain the integrity of your design.
- Keep your glue thick. If your design allows it, you’ll have a much easier time if you can maintain a good thick stream of glue from your glue gun.
On Painting
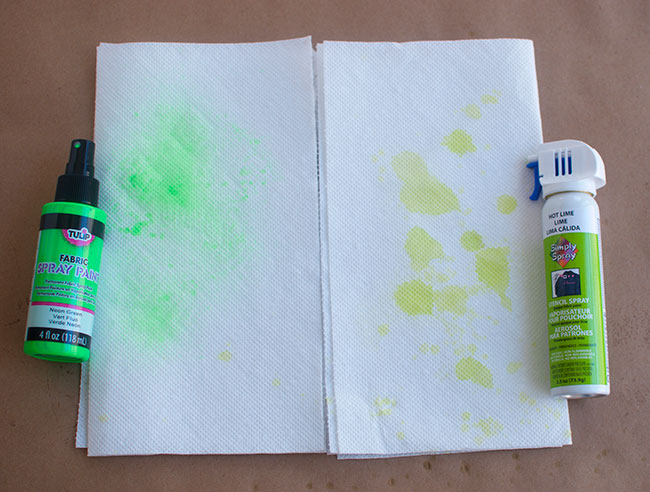
I wasn’t sure which fabric spray to go with, so I picked up both and I’m so glad I did. On the left is the Tulip Fabric Spray Paint, and on the right is the Simply Spray Stencil Spray
.
The Tulip fabric spray was by far the better fabric spray paint. For one thing, it sprayed better. Unfortunately, the Simply Spray would only come out in huge drops and everything you see on the paper towel is all I could get out of it. It actually stopped working at this point. I read the directions, but there’s always the possibility of user-error, so I’m not quite ready to throw Simply Spray under the bus.
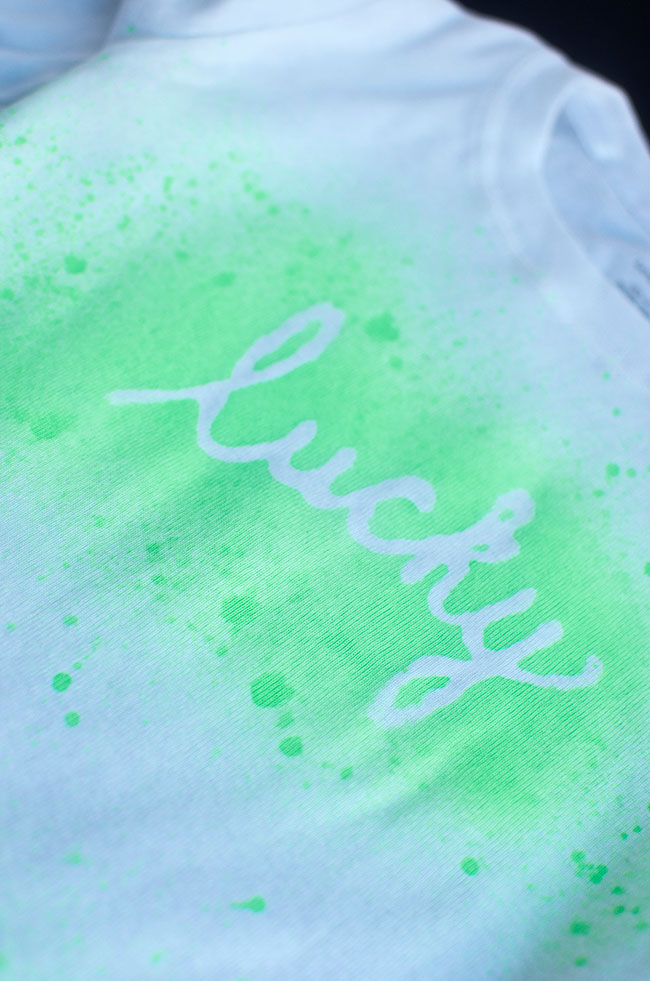
In any case, I went with the Tulip spray paint.
The glue gun stencils came off very easily with not sticking or unwanted marks left behind.
I used cardboard between the layers of the shirts to make sure no paint went through to the other side. You could also use poster board, or even freezer paper. Anything flat and mostly impermeable.
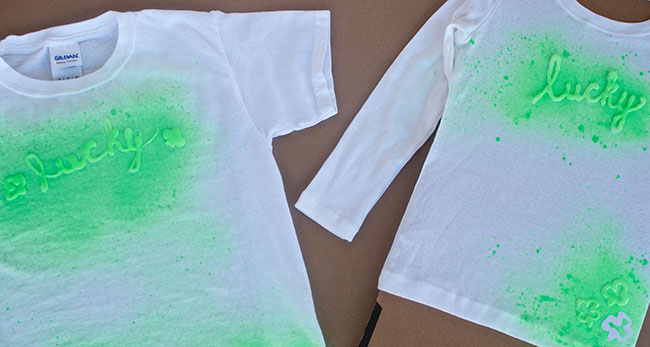
It didn’t take long for the shirts to dry and they were easy and fun enough that I’ll likely use them with the kids next time.
What do you think about the glue gun stencil? Have you tried this process before? If anybody has any extra tips they’d like to share I’d love to hear them!